The results were pleasing to me... at least so far.
I wanted to build a sizable backyard foundry to melt aluminum in for casting but I had trouble finding the usually recommended ingredients in my area for a castable refractory. No one around carried fire clay, furnace cement, fireplace mortar, high temp cement, or even terra cotta chimney pipe! What to do???
After a lot of searching (mainly over the telephone) I finally decided to experiment with a mixture of my own devising. I began to wonder how good old Georgia red clay would hold up to high heat. I've certainly got plenty of it. So I dug about a foot down in my backyard until I hit the red clay and half filled a wheelbarrow with it. Then I sifted it through a window screen laid over a plastic tub. Sifting the dirt went pretty quickly and was actually somewhat enjoyable, seeing all the little remaining pieces of quartz and whatever that constitute my backyard. Didn't find a single lost diamond ring in the whole load though.
I wanted to try using a good percentage of red clay, some sand (which I figured would help in vitrification), and perlite which has good heat insulating qualities and is one of the recommended ingredients which I was able to aquire. But I figured this mixture would need something to bind it together, so I went with readily available portland cement.
My formula worked out like this, nothing scientific about it, I just guesstimated:
6 parts red clay (sifted through window screen)
5 parts portland cement (also sifted, I found chunks of splintered wood in it)
3 parts white play sand (from Walmart)
4 parts perlite (from Lowe's)
Before building a large furnace, I decided to experiment with a small kiln to see how my mixture would stand up to the heat. Perhaps I should not call it a kiln, since I'm melting metal in it... maybe it is just a tiny electric furnace? Oh well, I won't split hairs.
The results were pleasing to me... at least so far. |
|
After ordering a bit of ni-chrome wire off eBay and constructing a hot wire foam cutter, I decided to destroy a small hair dryer that I had in order to get the really nice ni-chrome wire coil out of it. The wire I ordered was just straight wire, but this was already coiled beautifully.
The thing about ni-chrome is it has a fair amount of resistance compared to other wire, yet little enough that it still allows a good amount of current to flow. Another thing is it holds up well to repeated heating and cooling even when heated to an orange glow.
I had to experiment a bit with the wire to see how much I wanted to use in the kiln. Here's where it gets dangerous, so here's the standard disclaimer:
|
Okay, got that out of the way... I know that didn't discourage everyone, so I'm writing the rest of this like a how-to... but don't say I didn't warn you if you get hurt.
Now, the hair dryer I destroyed had a high and low setting, and it used two sections of wire element. How to figure out what to use in the kiln? Well, I could probably reason it out... but.. aw hell, lets just hook it up and see what happens. Bareing the ends of a 115vac supply cord, I clipped a couple of jumper cables on and clipped the other ends to the element sections. The more wire you use, the more resistance the voltage sees, so the less current flows so the cooler the result. Clipping to shorter sections of the wire result in higher heat. I was looking for a nice orange glow that I figured would get the kiln up to the 1500 degrees F. that is needed for melting aluminum to pouring temperature. But I also figured that a nice bright orange glow out in free air might not translate to the same when crammed up against a refractory lining which was absorbing and reflecting the heat, so I knew that some adjustment would probably have to be made. Better to leave it long to start out and trim it shorter as necessary later once it is installed into the kiln. I also found that if you stretch the coils longer, it needs to be done uniformly, so that all the coils are spread out the same or you will have hot spots. That means if you have the majority of the coil a nice orange color, the hot spots will be really bright and about to burn out.
Groovin'...
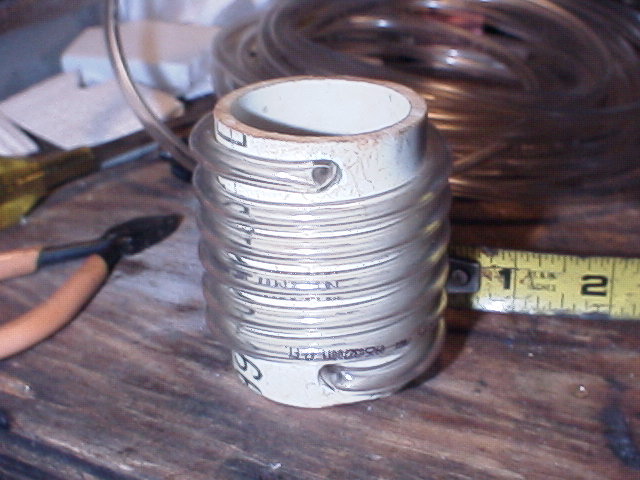
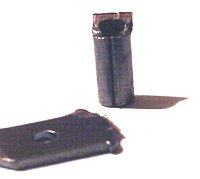
In order to create grooves inside the cast refractory to hold the heating elements, I came up with this idea. Others may have done this or something similar, but this was original to me. I dug a piece of pvc pipe out of the junkbox that was the diameter I wanted the heat chamber to be. After wrapping my heating element around the pvc to see how many turns it would make, I wrapped 5/16" O.D. plastic tubing the same number of turns around the pvc pipe. The ends of the tubing were stuck in holes to secure it and the wraps were carefully and evenly seperated. A dab of hot glue here and there would make it more secure for what is to come, but I didn't own a hot glue gun yet. That has since been rectified and I find the hot glue invaluable for many uses in projects. Note: it would be best to plug the bottom end of the pvc or fill it with clay or something. I didn't do this and had problems when pouring the walls with the mix creeping underneath into the pvc tube. That made extra work for the Dremel tool grinding it out later, and made removal of the pvc more difficult. |
|
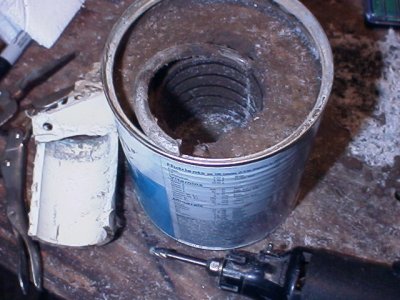
The next step was to embed this assembly in my experimental refractory mix. For my container I had selected a steel can (which dry powdered infant formula came in) that measured 4 inches wide x 5 inches tall. I mixed my refractory ingredients dry, then added just enough water to make a paste. The first batch was just enough mix to cover the bottom of the can about an inch deep. Using a small trowel, I poured/troweled the mixture in and then attempted to remove any air bubbles, since I have read that trapped air/steam will expand when heated and if it cannot find an escape route, it will create one, cracking or even bursting your refractory. To remove bubbles, I tapped the sides of the can for about 15 minutes with a screwdriver. I did see bubbles coming to the surface and bursting, but it also appeared that the tapping was causing the perlite to rise to the top as well. So I quit and hoped that the majority of the air was removed. I allowed this to set up, about an hour or two, until it was firm enough to support the pvc assembly.. Next, I mixed up a batch of refractory judged to be enough to create the walls of the kiln. Using the small trowel, I mashed the refractory between the coils of tubing, being careful not to disturb their position, but trying to fill all the gaps. I set the pvc/tubing assembly in the center of the can and poured/troweled the remaining refractory around the sides until even with the top of the pvc pipe. Then followed another session of air bubble removal which I stopped when the bubbles slowed down and the perlite was accumilating at the top. The next step won't come until the mixture has set up pretty firmly, so go check your email, check CNN to see if we have picked another fight with any new countries, and watch a science documentary. I gave it 12 hours to set up. It needs to be really firm, but not rock hard for the next step. |
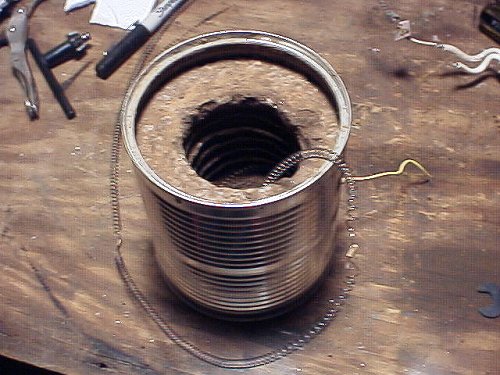
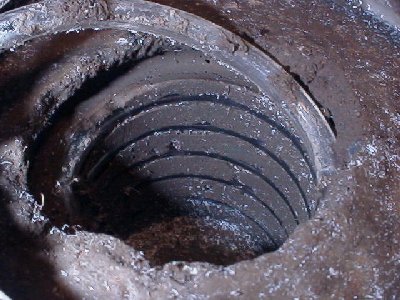
Now you get to destroy the pvc/tubing assembly. It is in the way and has got to go. I used my Dremel tool to perform the deed. In retrospect, if I had given the assembly a thin coating of vaseline, the whole thing might have gone a bit smoother. Then again, the vaseline might smoke and smell when you first fire the thing up... I dunno. Just be careful to cause as little damage as possible when pulling the tubeing out, but you will have to remove some of the mix on the inside of the tubeing so when you pull the tubing out, you won't completely destroy the grooves. I decided that it was best to just grind it down to where I was grinding into the tubeing itself. Then pulling the tube out caused no additional damage. A groove half the diameter of the tubing is quite acceptable.
 |
 |
If you don't have a dremel tool.... hmmm... well, I'm sure you will figure something out. |
|
One more thing to do before letting the mix cure all the way. We need holes for the supply wires. I decided to feed the coil with some 14 gauge copper wire I had laying around. I selected an appropriate sized metal twist drill bit and after care measurement and even more carefull eyeballing, I made holes in the steel can, each aimed at the two ends of the spiral groove inside. Then I drilled on through the refractory with a same-sized masonry bit because I knew my steel bit would not like that abraisive stuff at all. Use little pressure, take your time. Let it eat slowly through the mix, especially when the bit is just about to break through. You don't want to damage it at this point!
Take a break. Let it cure until really hard now.
Installing the element...
|
|
 |
 |
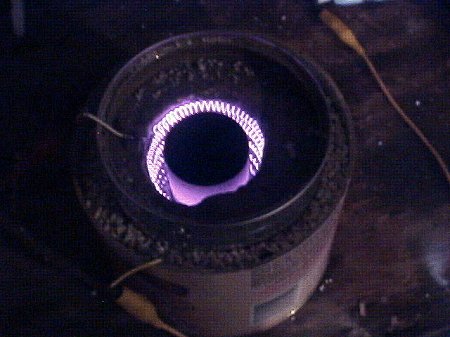
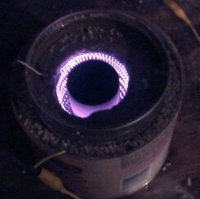
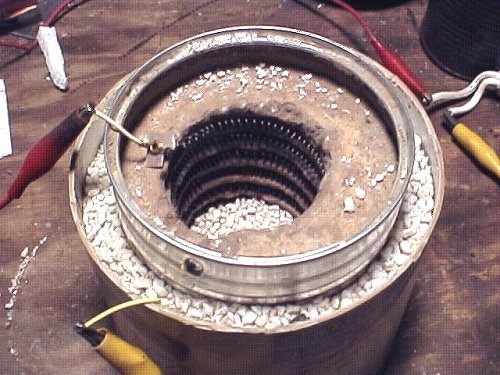
The mini kiln ready for a test run. Notice that I was not yet using the top supply wire hole and still had the original hair dryer wire complete with mica insulator. Also notice I added a heat insulation jacket around the steel can to help keep the heat in. A large Coffeemate can packed with pearlite. Works quite well, but I would never leave this thing going unattended. |
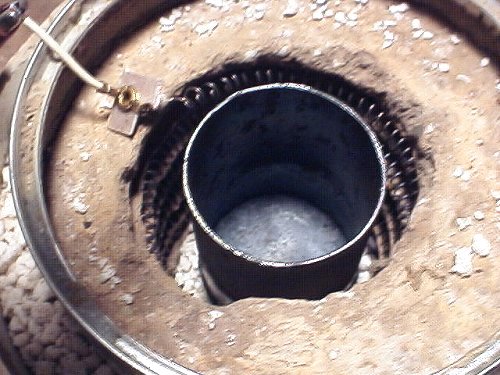
I made a mini crucible out of a piece of thin walled steel pipe by welding a 1/4" plate to the bottom and grinding it round. Pearlite was added to the bottom of the heat chamber to even it out after I gouged out the floor with the Dremel tool removing some refractory mix that had seeped in under the pvc pipe. |
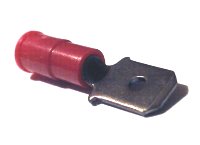
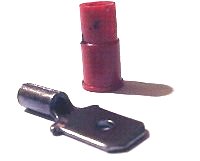
About here I realized that no way was the insulation on that 14 gauge going to hold up to the heat, and I had it feeding through a small hole in a steel can. I'm crazy, but that was skating a bit too close to the edge for me! Here is another place the Dremel tool shined. I chucked up an abrasive cut-off wheel and chopped a one inch square in the steel can around each feed hole. The refractory mix is a fine insulator in itself. Then I slid on a couple of high temp insulator sleeves I found in the wreckage of the hair dryer. There is wire with high temperature insulation very available on eBay which would be better suited for this, but I was working with what I had laying around. The supply wire does not have to be 14 gauge. I picked it because it was ready at hand and I figured the stiffness of it would be an asset. The jumper leads I used have thin wire inside, but they did not heat up enough for me to notice. |
 |
|
|
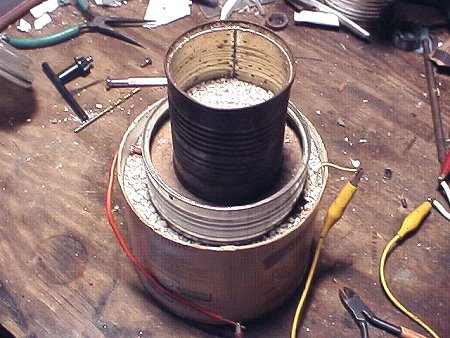
Here the mini kiln is equiped with a new high tech insulated cover to keep the heat in. Notice the ultra-clean, organized workplace.
|
Was it all worth it? Ohhh Yeah! It was fun. It was dangerous. It took 12 minutes to melt a crucible full of aluminum. I got two good melts out of it. On the third melt I was letting it get really good and hot before pouring and it melted a hole in my steel crucible! The walls were too thin! And I'm apparently running it too hot (or maybe there was some magnesium in the aluminum). I'm saving up my pennies for a pyrometer. The mess was fairly easily cleaned up and the element repaired and it's ready for another go. |
So... how did my off-the-cuff castable refractory formula work out? It could not be anything but beginner's luck, because I definately did not know what I was doing, but that mixture worked out beautifully. No cracks, no crumbling, and after firing, it is hard as rock. |