My
Build of "Tom's Easy CNC Mill"July,
2009
I
have chemically etched my own printed circuit boards for small electronic projects since the 1970's. Back then, most components were larger, the traces could be thicker, and I could just hand-draw it with a resist pen or use trace tape if I wanted it to look neat. Things have changed.
Now I've designed a control board for my heliostat project that uses a picaxe microprocessor and, while it ~could~ be drawn freehand, it would be difficult to say the least. I have breadboarded the circuit and it works, but as I transfer concept to practical use, and impliment the picaxe program to do what I want it to do, the board will probably be revised many times. Hand drawing it even once takes too long with a double-sided board of that complexity.
One fine surfing day, this YouTube video caught my eye. https://www.youtube.com/watch?v=6drMZqmyXQc
It is Tom's "Easy Mill". My jaw flopped open as I watched and when it was over I said "I gotta build one of those!!!" Then I started reading up on CNC and driver boards and software and I said "Uhm... This looks pretty involved... maybe later."
Well, later has come. Now I not only want the mill, I need it. I need the precision routing for the pc boards I want to make, and without having to go through the etching process to boot!
But it is still involved. This page will show what I've done to build Tom's Easy CNC Mill.
 |
June 19, 2009
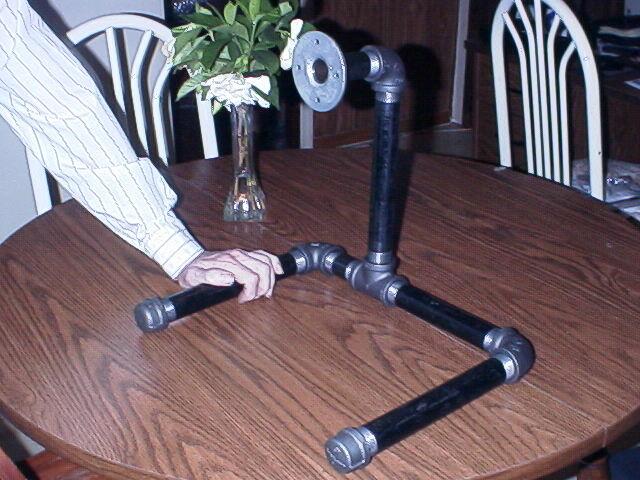
Well, this part was Easy. Watched Tom's video again with pad in hand. Guessed at the pipe lengths though somewhere I read 1" pipe. I think he meant 1" outer diameter and I bought 1" inner diameter. So my mill will be bigger, more sturdy, more costly, but maybe I can do more work with it too.
All the pipe and some threaded rod cost me about $50US.
|
|
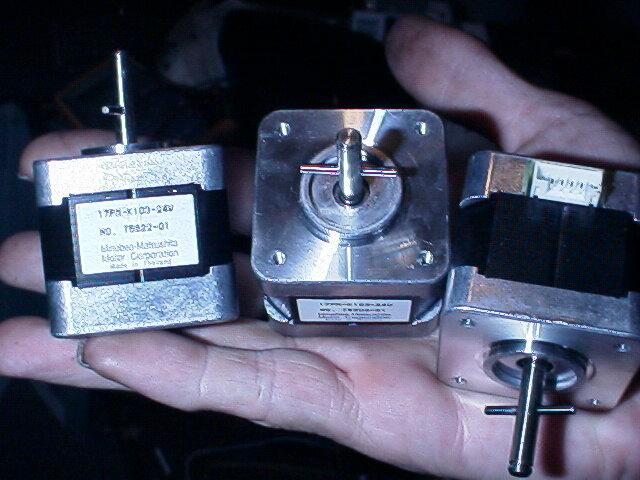
eBay is a good source for needed materials, and if you are patient, you can wind up with them at a good price.
I got these three new stepper motors for 9.95 USD plus 8.00 shipping.
Of course, they could be cheaper if removed from junked equipment. Check your local recycler if they will let you look around. |
June 20, 2009
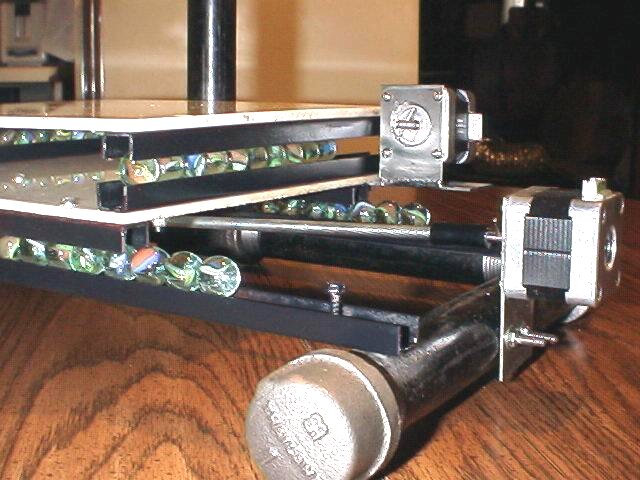
If you watched Tom's video, you will notice I deviated a bit from his design. Tom used channel aluminum for his rails. I had some channel steel that I used. It is the stuff you put vertically on a wall and has slots in it that shelf brackets fit into. It was nice and straight but a bit rusty. I gave it a good working over on the wire brush of my bench grinder and got it where you could run your finger over it and it was smooth to the touch. But when I assembled the X-stage and installed the little bearing assembly, I was concerned over the amount of friction there was. It was a lot harder to push and pull than I expected. In the video, Tom's looked like it slid quite easily.
While I was mulling this development over, my eye strayed to a pile of junk on the side of my workbench in which sat a marble. Hmmmm... I put the marble on the slot of the rail and put another piece of channel steel on top of it. It moved practically frictionless. So I hunted down 3 more marbles and tried it again. The top rail still moved easily and there was no discernible latitudinal slop. "Hey... I might be on to something here!" said I.
So, as you can see in the pictures, I put it together with glass marbles to act as bearings. It remains to be seen how well it will work in actual practice, but if it works, marbles can be had 100 for a buck at the local dollar store. The bearings Tom used cost a bit more and are harder to find. I put a screw in the end of each rail to keep the marbles from escaping their duty. (Dont'cha just hate it when you loose your marbles?)
|
 |
|
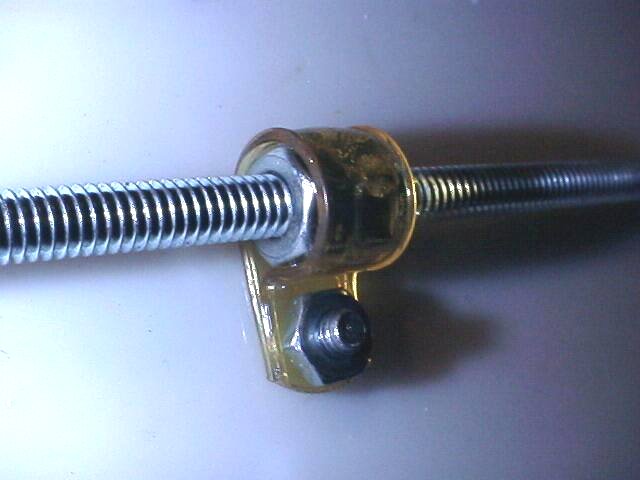
I used 1/4" x 20 threaded rod and found that "3/16" ID Fuel Hose (Lowes #22283) was perfect to join the rod to the 1/4" shaft of the motor. |
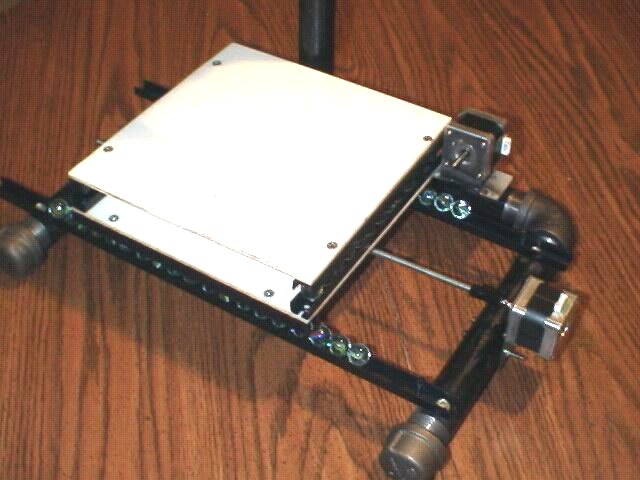
In the video, Tom showed how to wrap metal around a nut to make a bracket for the threaded rod to attach to the underside of the stage.
I did it a little differently and I think this was easier.
I just took a standard size cable clamp, smeared a very thin layer of gorilla glue inside it and inserted two 1/4" x 20 nuts. I threaded the rod into them so their threads were in sync and let the glue cure. I'm sure this looks better than what I would have wound up with trying to copy Tom's metal gizmo.
|
 |
|
July 3, 2009
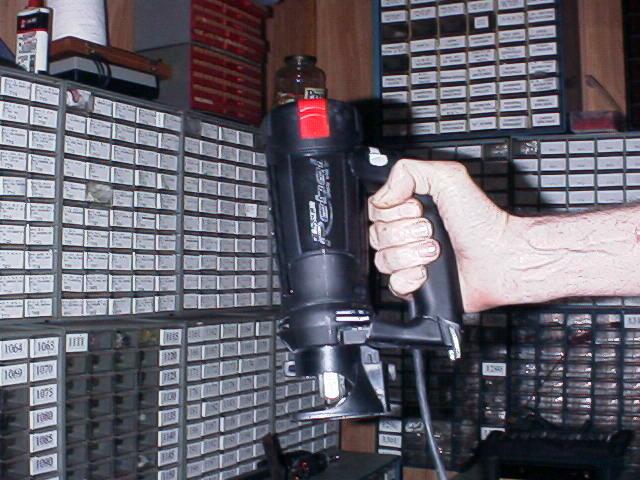
I just changed the brushes in my Dremel tool (again) and didn't look forward to using it as a router even for light work like pcb etching, so I've been on the lookout for a good router motor. I'd read that some people use Rotozip with good results and I have been bidding on them on eBay. Finally got one that stayed down in my price range. Got it for $12.50 plus $12 shipping! It's not new, but it looks like it has had light use.
List price is $109 USD so I'm happy. |
July 3, 2009
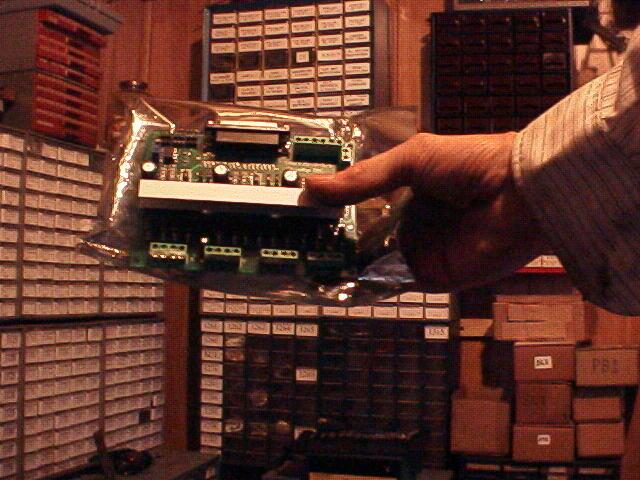
I had a "chicken or the egg" problem for a while trying to decide how to make the pc boards for the pc board maker.
After looking at lots of driver board designs and even breadboarding a few, I finally decided to get the chicken first and I'd make the eggs later, so I bought this 3 axis motor driver board made by Univelope which I got on eBay for the starting bid of about $50. Hell, it would have cost me close to that just for the parts even if I had made the pc board for it!
I think this will drive my three 1 amp stepper motors just fine. |
 |
UPDATE: July 28, 2009 -- After several design changes and a whole lotta learnin', my mill is almost ready for prime time. The Univelope driver board works great. The eBay seller's nick is Hanovercat and he has a webstore at: www.cncgeeker.com
Join us on Gabriel's forum: http://cerebralmeltdown.com/forum/index.php
There are threads on diy CNC and diy Heliostat where we document day to day progress. You can learn a few ways to do it and lots of ways not to do it.
Stay Tuned...
And a tip of the hat to Tom.
UPDATE: November 2011 -- A lot has happened in the last two years. Some good, too much of it bad. I'm now adding a second page of the saga. Hope you enjoy it.
PAGE 2 of my build of The Easy Mill
HOME
updated November 25, 2011

Free counters provided by Andale.